The content of the article
When carrying out major renovations in the bathroom, residents are necessarily faced with the problem of how best to make a sealed joint between the tiles and the bathtub. The quality and reliability of this problem area determines the cleanliness and dryness under the bathtub, as well as the overall comfort in the room. In order not to torment yourself with the question of what comes first: the bathtub or the tiles, there are several proven options for sealing the seam with your own hands, which are discussed in this article.
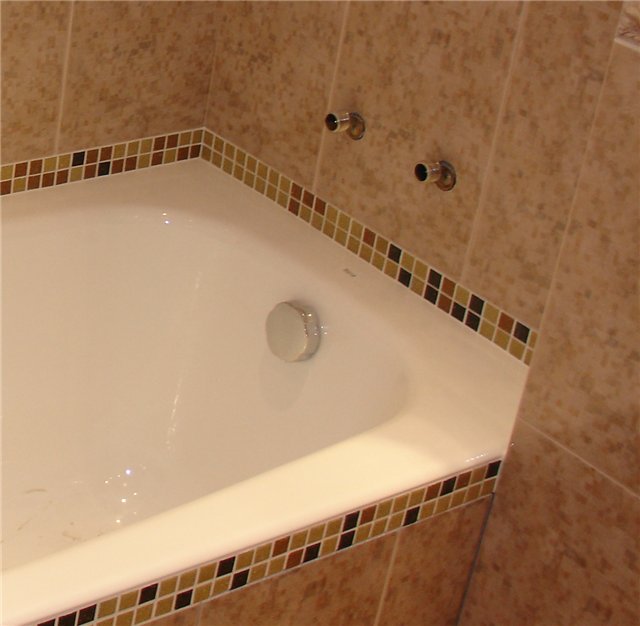
Joint between bathtub and wall
Seam sealing methods
The simplest and cheapest way to treat the joint between the bathtub and the adjacent tiles is to cover it with the necessary layer of cement mortar and then coat it with a waterproof compound. To seal a seam with mortar you must:
- Thoroughly clean the edges of the bathtub and the adjacent wall surface from dirt and building materials.
- Close the gap from below with any available material to minimize the penetration of solution under the bathtub.
- Moisten the surfaces slightly with water for better adhesion of the solution.
- Next, you need to fill the joint with a solution of the required consistency.
- After the solution has completely dried, it can be coated with paint, tiles or special tape can be glued to give the joint an improved appearance.
This method is practically no longer used, since modern building materials offer more modern and effective options, using which you can make a high-quality seam:
- Using special grout.
- Application of waterproof sealant.
- Special tile skirting boards and strips.
- Application of a combined method.
Grouting the joint
The industry produces grouts in different colors to optimally match the color of the tile, bathroom or tile joint. White grout is most in demand. This method is effective in creating a minimal gap between the bathtub and the tiles. To seal the joint between the bathtub and the tiles, it is necessary to apply grout with a spatula, followed by treatment with a dirt protection agent. The advantages of grouting are:
- ease of doing the job;
- good moisture resistance;
- color preservation.
Sealing with sealant
If, after renovation, a joint up to 3 cm wide is formed between the bathtub and the tiles, it is advisable to use a waterproof sealant to eliminate the problem.
The only condition that must be met is that the adjacent surface of the bathtub and the wall is dry and clean. The sealant is usually applied in white (or to match the plumbing fixtures).

Specialized stores are ready to offer a wide range of sealant colors
To minimize the formation of mold, it is advisable to choose sanitary silicone. To seal the seam you need:
- Thoroughly clean and dry the surface to be sealed.
- Degrease adjacent surfaces with any solvent.
- Tape must be placed on the wall and bathtub along the seam. In the future, it will protect the surfaces from sealant.
- Squeeze out the required amount of silicone from the tube, after inserting it into a special device (gun), along the length of the junction of the bathtub with the tiles. Due to its elasticity, it will fill the joint cavity well. The sealant must be applied in one pass in one layer. After the first layer has hardened, it will not be possible to apply a second one on top of it.

Sealing the seam with silicone sealant
- Carefully spread the sealant along the seam with a spatula until an even layer is obtained.
- Next, moisten the brush in a diluted soap solution and run it over the not yet hardened layer of silicone. Thanks to its ductility, it takes on the shape specified by the brush.
- Before the seam dries, remove excess sealant using a rag soaked in water.
[note] To obtain an even seam, after applying the sealant, you can stick a strip of masking tape onto the joint. After the joint has completely dried, the tape is removed and a perfect seam is obtained.[/note]
If the gap between the bathtub and the tiles is large, then it must first be foamed. When foaming, it is very important that the product does not get on surfaces outside the seam. In this case, removing the foam will be very problematic. The usual waterproof foam is used. It is resistant to moisture. The foam is applied along the length of the seam, after drying, the remaining material is removed with a stationery knife.
Skirting boards for joints
You can reliably seal the seam between the bathtub and the tiles if you use special borders (plinths), which are included with many types of tiles. The procedure for laying borders is similar to the process of laying tiles. Tiling the bathtub provides a strong and reliable joint.
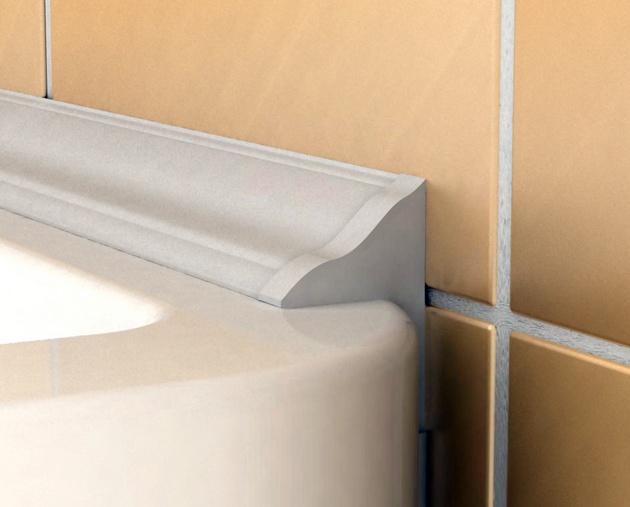
Ceramic baseboard
In addition to ceramic skirting boards, when the gap width is 4 cm or more, you can use borders made of plastic or in the form of self-adhesive tapes, which are secured with sealant. To install a polyurethane skirting board, you must perform the following operations:
- First, the bathroom under the tiles and walls, as in previous versions, are thoroughly cleaned and degreased.
- Measurements are taken and the plinth of the required length is cut.
- To form an angle, you need to cut the ends at an angle of 45 degrees. Clean the cut areas with sandpaper.
- Apply liquid nails to the inner surface of the baseboard and wait a few minutes.
- Then he will install the plinth so that it reliably covers the gap and press firmly for a short time. Particular attention must be paid to the corners.
- After gluing the baseboards around the perimeter of the bathtub, it is necessary to apply a thin layer of silicone sealant along the upper and lower junctions.
[note]A brush dipped in soapy water can give silicone joints an aesthetic appearance.[/note]
Plastic skirting board
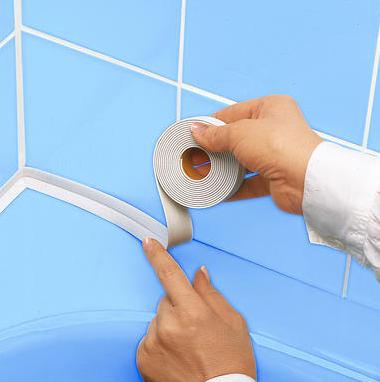
Sealing tape
Semi-rubber tapes are made in different sizes, have a self-adhesive layer, and also have a bend in the center, which makes the installation process much easier. To use sealing tape you must:
- Clean and dry the surface.
- Remove the protective film from the adhesive side of the tape.
- Warm the tape slightly with a hairdryer.
- Carefully place it on the joint and press lightly.
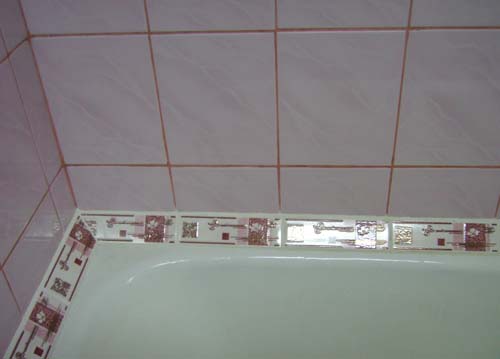
Self-adhesive tape
Connecting the bathtub to the tiles in this way provides an elegant and airtight joint.
Combined method
This method is a combination of the options discussed. If you decide to use a combined method, you must:
- Seal the gap with foam, trim off the excess after drying.
- Apply waterproof sanitary sealant to the rough surface.
- After it has dried, stick a semi-rubber self-adhesive tape on top of the sealant layer.
The result is an even, hermetically sealed, beautiful tile-bathtub joint.
Thus, eliminating the gap between the bathtub and the wall is not particularly difficult. Properly laying tiles around the bathtub and using one of the DIY methods for sealing the seam will ensure the safety of using sanitary appliances, dryness and comfort in the bathroom.